TS
heero23
Japanese Destroyers In Battle of Sunda Strait
The Battle of Sunda Strait was won by Japanese destroyers. In no other action in the Pacific War were their destroyers given the opportunity of using the tactics they had practised since the Battle of Tsushima. This account of the battle in which HMAS Perth and USS Houston were lost is a translation of the official Japanese proceedings.
First Phase
The action began when the destroyer Harukaze sighted two enemy cruisers southeast of Babi Island at 2305. Two minutes later the Allied cruisers commenced firing at the transports on the eastern side of St Nicholas Point. Harukaze promptly laid a very effective smokescreen to cover the transports. Prior to the commencement of the action the destroyer Fubuki, on patrol off Babi Island, had sighted the Allied cruisers, and after making an enemy report had shadowed them for some period.
At 2313 Fubuki observed the Allied cruisers alter course to starboard and one minute later the destroyer fired 9 torpedoes at Houston at the short range of 2,500 metres. While on the same course Fubuki illuminated the two cruisers to port and fired 16 shells; Fubuki observed one torpedo hit and that Houston had reduced speed. In the meantime Perth illuminated the Japanese destroyer and opened fire on her – there were no hits.
At 2315 Admiral Hara ordered all destroyers of the 5th and 11th Squadrons to make an attack. At the same time he ordered the heavy cruisers Mogami and Mikuma, which were escorting a convoy to the north, to join his forces. At 2322 the destroyer Katakaze fired at Perth at a range of 3,500 metres and started a fire. At the same time the destroyer illuminated the cruiser. Perth shot at the destroyer furiously, but no hit was scored. Admiral Hara now ordered the 5th Destroyer Squadron to make a torpedo attack at 2326. Katekaze joined in the attack which was made at 2332 at a range of 10,000 metres. This ended the first phase of the battle.
Second Phase
The 11th Destroyer Squadron approached the Allied cruisers on course 135° and at 2340, in spite of furious Allied gunfire, fired 27 torpedoes (9 each) at a range of 350 – 380 metres. They then laid a smokescreen and retired to the north.
The 5th Destroyer Squadron had also closed the range by 2340. The leader Harukazi was hit, her rudder was damaged and she veered to port and could not fire her torpedoes. The second destroyer Hatekaze lost sight of Perth, having suffered many near-misses. But at 2343 Asakaze fired six torpedoes at Perth at 3,700 metres and then escaped to the north. At the same time as Asakaze fired her torpedoes, the light cruiser Natori (the destroyer flagship) illuminated Perth and opened fire. One minute later Natori fired 4 torpedoes at Perth while on a parallel course to starboard. Admiral Hara in Natori then ordered those destroyers who had fired torpedoes to retire to the north with him under cover of a smokescreen.
The 12th Destroyer Squadron had sighted Perth and Houston at 2336 at a range of 13,000 metres, 15° on starboard bow. At the same time the destroyer Shikinami, which was screening the Japanese heavy cruisers, sighted the Allied cruisers dead ahead. At 2343 Mogami and Mikuma closed in and three minutes later Mikuma catapulted an aircraft for gunnery observation. At 2344 a hit was observed on an Allied cruiser, which returned the fire with their main and secondary armament and machine-guns at Natori and her destroyer. Both Perth and Houston were hit repeatedly and their speeds declined – the two cruisers now separated. Shirayuhu and Harukaze were both hit and each suffered eight casualties.
Third Phase 2346-0032.
Mogami and Mikuma each fired 6 torpedoes at 2349 at a range of 11,200 metres while on a parallel course 110° to the Perth and Hobart, this was near Babi Island. At this time Perth and Houston were firing furiously at the 11th Destroyer Squadron. From 2348 the 5th Squadron, second group, was also under fire. Harakaze (of 5th DS) started a torpedo attack at 2349, but because of near misses this had to be aborted.
At this period the Allied cruisers changed course to starboard. Harakaze rapidly closed the range and at 2356 fired 6 torpedoes at Perth and then retired to the north. Two minutes after firing, a very large waterspout was observed and it was assumed that a hit had been scored on Perth. Two minutes later Hatekaze fired 6 torpedoes at a range of 38,000 metres and then retired.
Mogami and Mikuma began firing at Houston at a range of 11,200 metres at 2352. The heavy cruisers scored hits and set Houston on fire. Her turrets exploded and there was a further reduction in speed. Allied searchlights were very weak and their guns ineffective.
Mikuma had trouble with her main switchboard at 2355 and her entire armament was consequently out of action. Two minutes later Mogami fired 6 torpedoes at Houston.
Five minutes after the trouble with her main switchboard, Mikuma began to bombard Houston at a range of 9,000 metres with illumination and many hits were scored. By this time Perth was on fire and Houston was heeling badly to port with her bows down.
The light cruiser Natori now returned to the scene of the action and opened fire on Houston at midnight at a range of 8,000 metres. Two minutes later the Japanese cruiser ceased fire because the Houston was covered by smoke. The 12th Destroyer Squadron, which had not yet been involved in the battle, closed in at about midnight and the destroyer Murakumo opened fire on Perth, which by then was out of control. About the same time two Japanese destroyers fired 9 torpedoes each at both ships and hits were seen. It was observed that Houston was in trouble with manoeuvring and the destroyer Shikinami had a damaged screw caused by a near-miss.
Fourth Phase 0008 – 0036.
At 0005 Admiral Hara had requested the time required for the Japanese destroyers to reload their torpedo-tubes. But at this time Perth was already sinking. At this time Perth was sighted by the Japanese heavy cruisers on course 090°, who opened fire at 7,300 metres. Perth sank at 0012+ and the Japanese ceased fire.
A history of HMAS Perth will be published by the Society in 1976 in its series ‘Ships of the Royal Australian Navy‘. A short biography of Captain H. Waller by Commander P.O.L. Owens was published in the Society’s journal ‘Naval Historical Review’ in 1972.
The Japanese times shown in this account do not correspond to Allied times quoted in the battle and HMAS Hobart did not participate in the Battle of Sunda Strait. Japanese losses are shown as much lighter than shown in Allied accounts of the battle.
USS Houston

HMAS Perth

HNLMS Evertsen

Mogami-class heavy cruiser

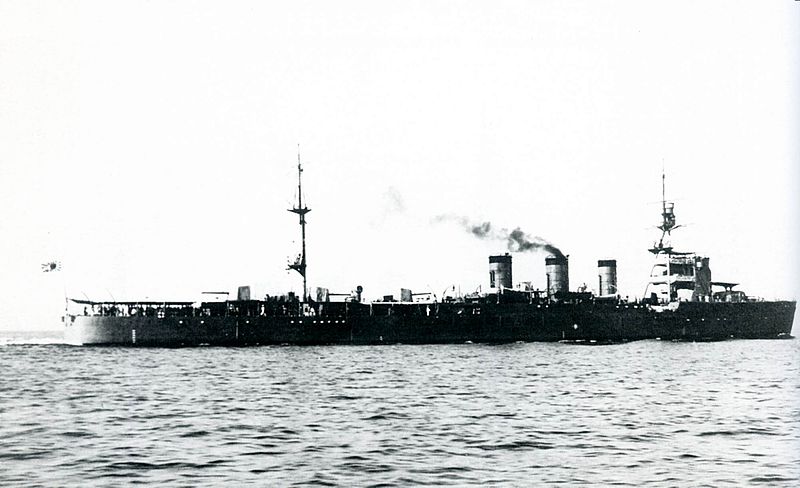
Nagara-class light cruiser
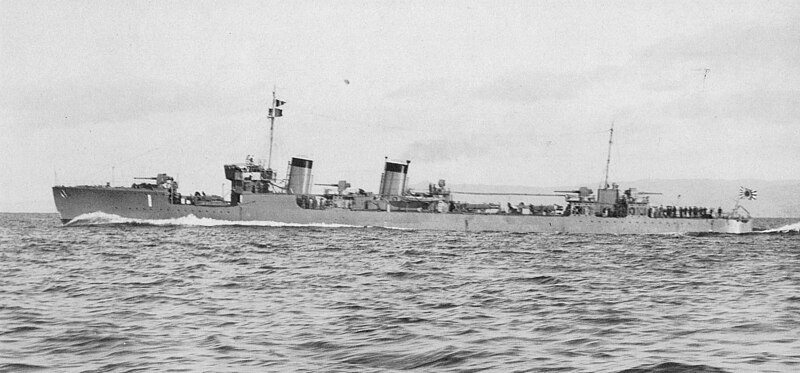
Fubuki-class destroyer
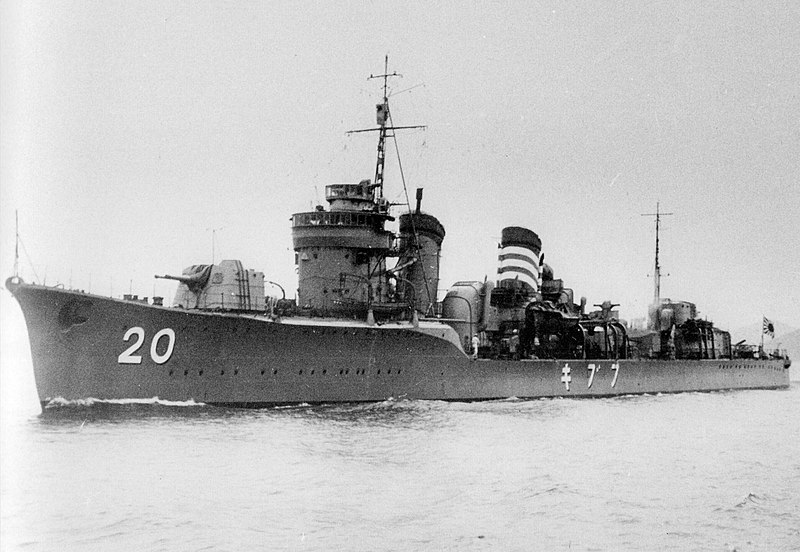
Kamikaze-class destroyer
Sumber
Artikel menarik. Dikroyok abis-abisan.
Jaman segitu belum ada NVG ya?
First Phase
The action began when the destroyer Harukaze sighted two enemy cruisers southeast of Babi Island at 2305. Two minutes later the Allied cruisers commenced firing at the transports on the eastern side of St Nicholas Point. Harukaze promptly laid a very effective smokescreen to cover the transports. Prior to the commencement of the action the destroyer Fubuki, on patrol off Babi Island, had sighted the Allied cruisers, and after making an enemy report had shadowed them for some period.
At 2313 Fubuki observed the Allied cruisers alter course to starboard and one minute later the destroyer fired 9 torpedoes at Houston at the short range of 2,500 metres. While on the same course Fubuki illuminated the two cruisers to port and fired 16 shells; Fubuki observed one torpedo hit and that Houston had reduced speed. In the meantime Perth illuminated the Japanese destroyer and opened fire on her – there were no hits.
At 2315 Admiral Hara ordered all destroyers of the 5th and 11th Squadrons to make an attack. At the same time he ordered the heavy cruisers Mogami and Mikuma, which were escorting a convoy to the north, to join his forces. At 2322 the destroyer Katakaze fired at Perth at a range of 3,500 metres and started a fire. At the same time the destroyer illuminated the cruiser. Perth shot at the destroyer furiously, but no hit was scored. Admiral Hara now ordered the 5th Destroyer Squadron to make a torpedo attack at 2326. Katekaze joined in the attack which was made at 2332 at a range of 10,000 metres. This ended the first phase of the battle.
Second Phase
The 11th Destroyer Squadron approached the Allied cruisers on course 135° and at 2340, in spite of furious Allied gunfire, fired 27 torpedoes (9 each) at a range of 350 – 380 metres. They then laid a smokescreen and retired to the north.
The 5th Destroyer Squadron had also closed the range by 2340. The leader Harukazi was hit, her rudder was damaged and she veered to port and could not fire her torpedoes. The second destroyer Hatekaze lost sight of Perth, having suffered many near-misses. But at 2343 Asakaze fired six torpedoes at Perth at 3,700 metres and then escaped to the north. At the same time as Asakaze fired her torpedoes, the light cruiser Natori (the destroyer flagship) illuminated Perth and opened fire. One minute later Natori fired 4 torpedoes at Perth while on a parallel course to starboard. Admiral Hara in Natori then ordered those destroyers who had fired torpedoes to retire to the north with him under cover of a smokescreen.
The 12th Destroyer Squadron had sighted Perth and Houston at 2336 at a range of 13,000 metres, 15° on starboard bow. At the same time the destroyer Shikinami, which was screening the Japanese heavy cruisers, sighted the Allied cruisers dead ahead. At 2343 Mogami and Mikuma closed in and three minutes later Mikuma catapulted an aircraft for gunnery observation. At 2344 a hit was observed on an Allied cruiser, which returned the fire with their main and secondary armament and machine-guns at Natori and her destroyer. Both Perth and Houston were hit repeatedly and their speeds declined – the two cruisers now separated. Shirayuhu and Harukaze were both hit and each suffered eight casualties.
Third Phase 2346-0032.
Mogami and Mikuma each fired 6 torpedoes at 2349 at a range of 11,200 metres while on a parallel course 110° to the Perth and Hobart, this was near Babi Island. At this time Perth and Houston were firing furiously at the 11th Destroyer Squadron. From 2348 the 5th Squadron, second group, was also under fire. Harakaze (of 5th DS) started a torpedo attack at 2349, but because of near misses this had to be aborted.
At this period the Allied cruisers changed course to starboard. Harakaze rapidly closed the range and at 2356 fired 6 torpedoes at Perth and then retired to the north. Two minutes after firing, a very large waterspout was observed and it was assumed that a hit had been scored on Perth. Two minutes later Hatekaze fired 6 torpedoes at a range of 38,000 metres and then retired.
Mogami and Mikuma began firing at Houston at a range of 11,200 metres at 2352. The heavy cruisers scored hits and set Houston on fire. Her turrets exploded and there was a further reduction in speed. Allied searchlights were very weak and their guns ineffective.
Mikuma had trouble with her main switchboard at 2355 and her entire armament was consequently out of action. Two minutes later Mogami fired 6 torpedoes at Houston.
Five minutes after the trouble with her main switchboard, Mikuma began to bombard Houston at a range of 9,000 metres with illumination and many hits were scored. By this time Perth was on fire and Houston was heeling badly to port with her bows down.
The light cruiser Natori now returned to the scene of the action and opened fire on Houston at midnight at a range of 8,000 metres. Two minutes later the Japanese cruiser ceased fire because the Houston was covered by smoke. The 12th Destroyer Squadron, which had not yet been involved in the battle, closed in at about midnight and the destroyer Murakumo opened fire on Perth, which by then was out of control. About the same time two Japanese destroyers fired 9 torpedoes each at both ships and hits were seen. It was observed that Houston was in trouble with manoeuvring and the destroyer Shikinami had a damaged screw caused by a near-miss.
Fourth Phase 0008 – 0036.
At 0005 Admiral Hara had requested the time required for the Japanese destroyers to reload their torpedo-tubes. But at this time Perth was already sinking. At this time Perth was sighted by the Japanese heavy cruisers on course 090°, who opened fire at 7,300 metres. Perth sank at 0012+ and the Japanese ceased fire.
A history of HMAS Perth will be published by the Society in 1976 in its series ‘Ships of the Royal Australian Navy‘. A short biography of Captain H. Waller by Commander P.O.L. Owens was published in the Society’s journal ‘Naval Historical Review’ in 1972.
The Japanese times shown in this account do not correspond to Allied times quoted in the battle and HMAS Hobart did not participate in the Battle of Sunda Strait. Japanese losses are shown as much lighter than shown in Allied accounts of the battle.
Spoiler for ,,,,:
Spoiler for Allied Order of Battle:
USS Houston
HMAS Perth
HNLMS Evertsen
Spoiler for Japanese Order of Battle:
Mogami-class heavy cruiser
Nagara-class light cruiser
Fubuki-class destroyer
Kamikaze-class destroyer
Sumber
Artikel menarik. Dikroyok abis-abisan.
Jaman segitu belum ada NVG ya?
Diubah oleh heero23 04-11-2013 00:53
0
3.1K
0
Thread Digembok
Thread Digembok
Komunitas Pilihan